Introduction
Do you use public Wi-fi? If so, do you take any precautions such as never visiting sites requiring passwords or other personal information? How about using a VPN?
The reason for taking these sorts of precautions when using public Wi-Fi is the risk of a malicious actor placing themselves between your machine and the access point. The common way of doing this is by setting up what’s called an evil twin. This is where the actor sets up an access point using the same SSID as the public access point, hoping to trick people into connecting to it. Once you’re connected to this access point, the actor can see all of the traffic between your machine and the internet.
The danger in this is that any passwords you’re using to log in to sites can be captured if the traffic isn’t encrypted. Most of the time, log in sites are encrypted since they default to using HTTPS. You’ll see this indicated by the lock symbol next to the URL. However, you may occasionally run into an unencrypted site allowing for unencrypted logins.
What I’m going to demonstrate in this article is how easy it is to see a password from captured unencrypted web traffic.
Setup
For this tutorial, I will be using Wireshark to capture web traffic. The OS will be Kali Linux running in VirtualBox since it comes with Wireshark installed by default. If using another system, installation instructions can be found at: https://www.wireshark.org/docs/wsug_html_chunked/ChapterBuildInstall.html.
It’s a simple installation for whichever system you’re on. For example, to install on Ubuntu, it’s as simple as running the command:
sudo apt install wiresharkWe’re also going to use tcpdump. Tcpdump allows us to capture packets from an interface and export the contents to a pcap for analysis in Wireshark. It is possible to run Wireshark while capturing live data and it’s fine for a limited number of machines. To reduce the amount of data that Wireshark has to process, it’s simpler to capture the amount of data you want first with tcpdump, then open the pcap file with Wireshark. Install tcpdump with the following command:
sudo apt install tcpdump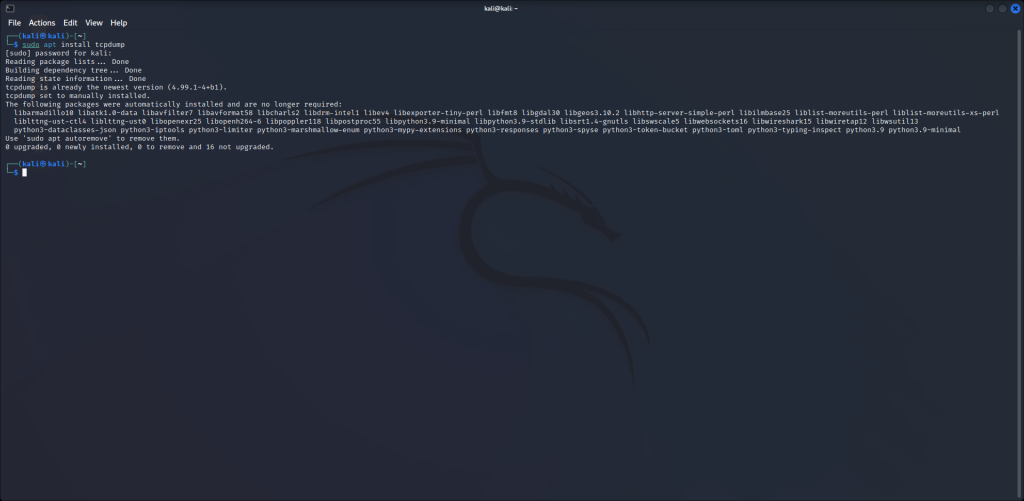
Next, we’re going to check our interfaces so we know which one to capture packets from. Run the command:
ip a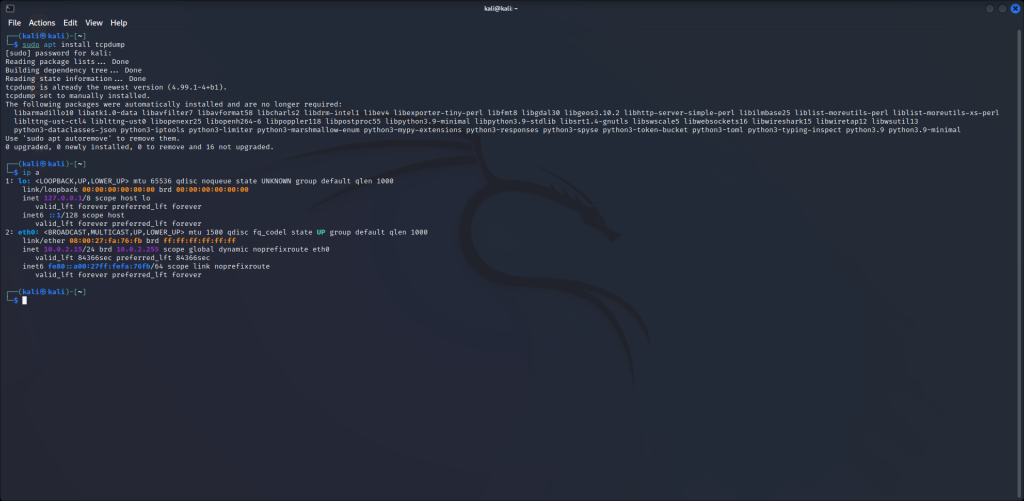
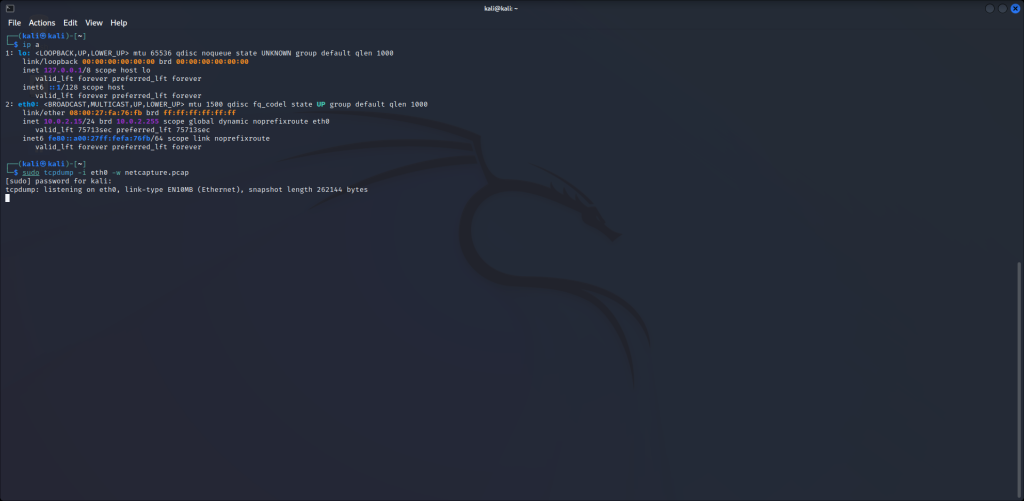
We see that we have two interfaces. The first one, lo, is our loopback address. The second one, eth0, is our network interface which has an IP address of 10.0.2.15. Now that we know our interface, we’re going setup tcpdump to start capturing data from it. Run the following command:
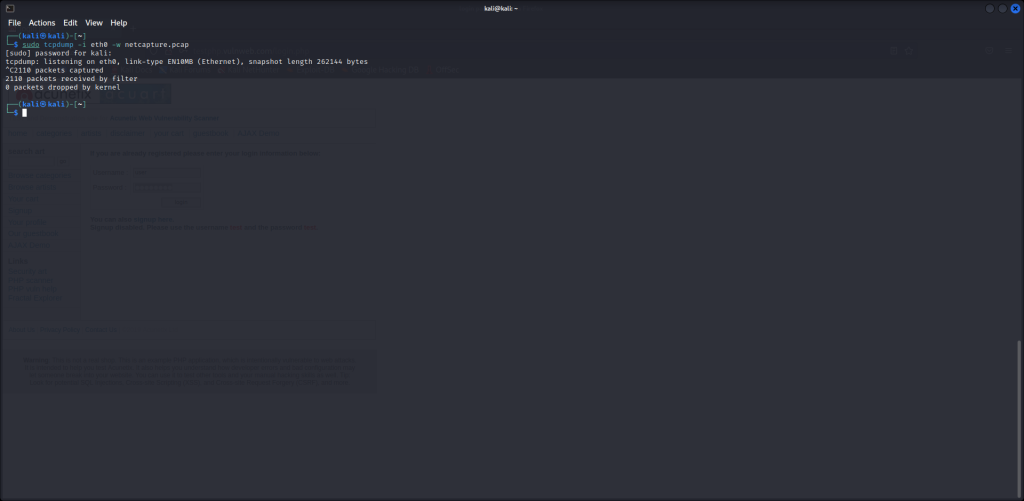
sudo tcpdump -i eth0 -w netcapture.pcapWith this command, we’re telling our machine to start capturing packets using tcpdump using interface eth0 (-i eth0) and write the output (-w) to a file named netcapture.pcap.
Traffic Capture
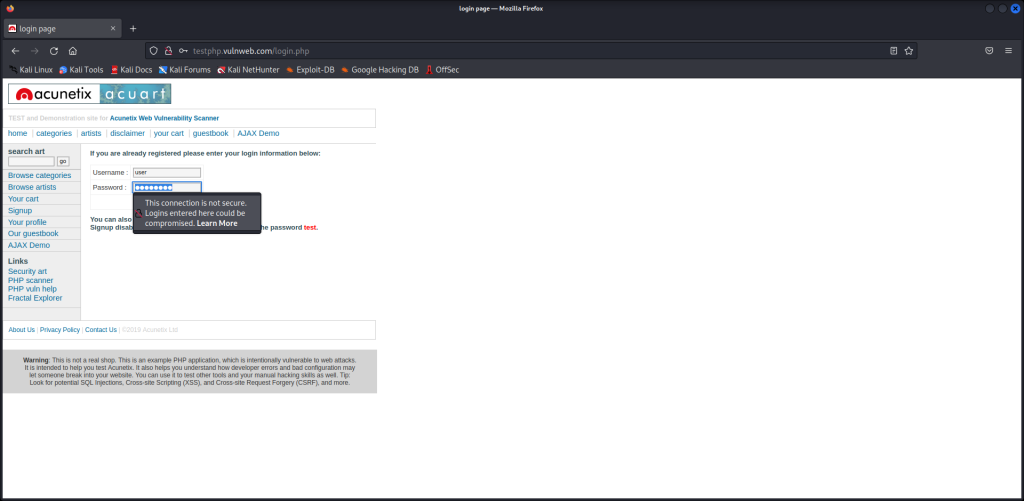
Next, we’re going to open up our web browser and go to a website to demonstrate how easy it is to see login credentials on unencrypted web traffic. The site is:
testphp.vulnweb.com/login.php
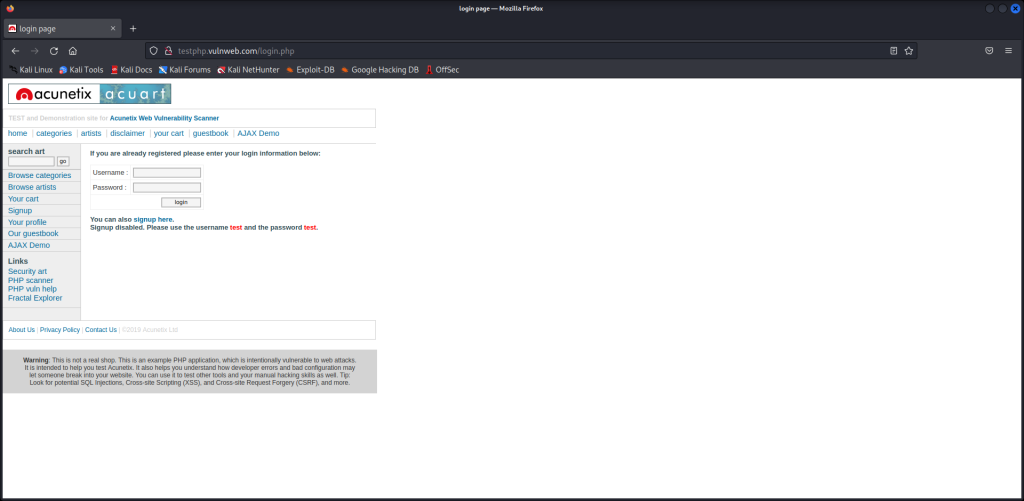

Enter “user” as username and “password” as the password. We’re not going to login to this site, only show that the credentials we entered into these fields are able to be captured.
Go back to the terminal and press ctrl +c to stop the capture
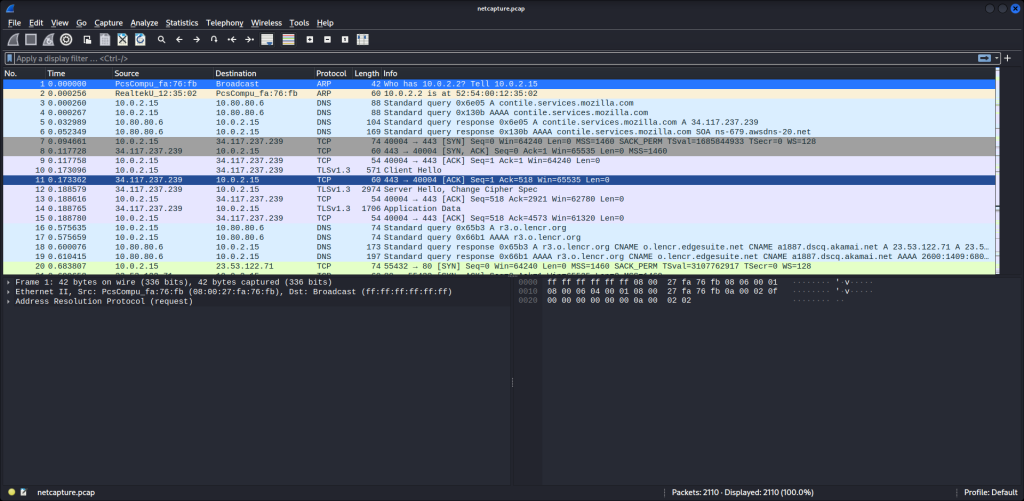
Now run the command:
wireshark netcapture.pcapThis will start wireshark using the pcap we just made.
On this initial screen, we see what we should normally see. We see an ARP request and reply from our machine to the gateway/router at 10.0.2.2. We see at DNS query from our machine to the DNS server which is the pihole server at 10.80.80.6
In the filter bar up top, we can type in “http” to filter out all of the streams not having to deal with http requests. This shortened our list dramatically. Since we know we were entering credentials into an unencrypted site, we can see under the protocol column it says “http” rather than “https.” We see OCSP as well which is for the Online Certificate Status Protocol which is the protocol used to verify the validity of certificates for websites.
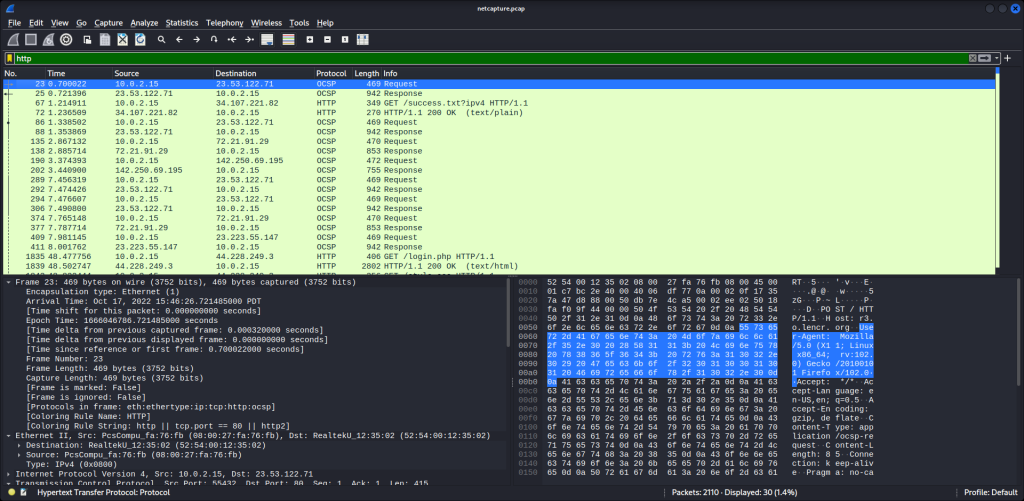
If we scroll down to packet 1967, we can see a POST method coming from our machine. This is where we entered the data into the login form.
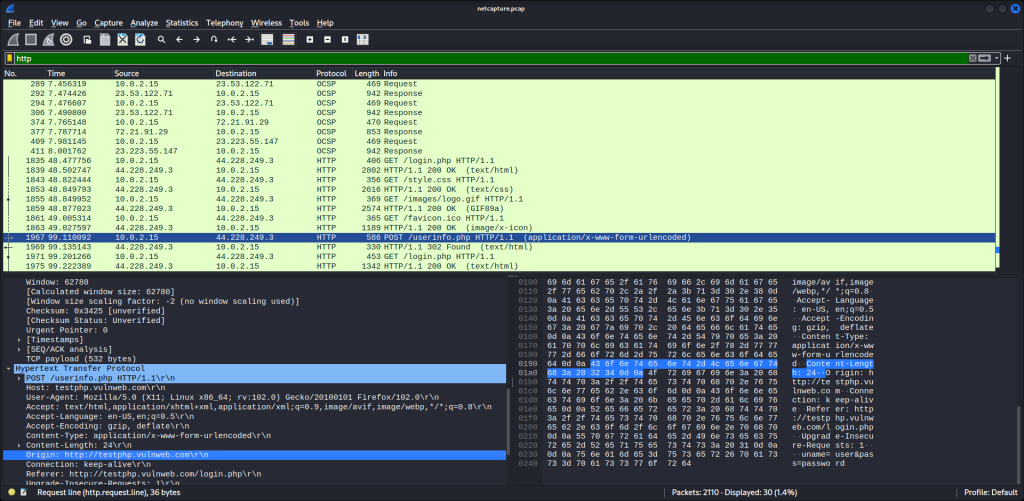
Let’s double click on this line and see if we can find the credentials we entered.
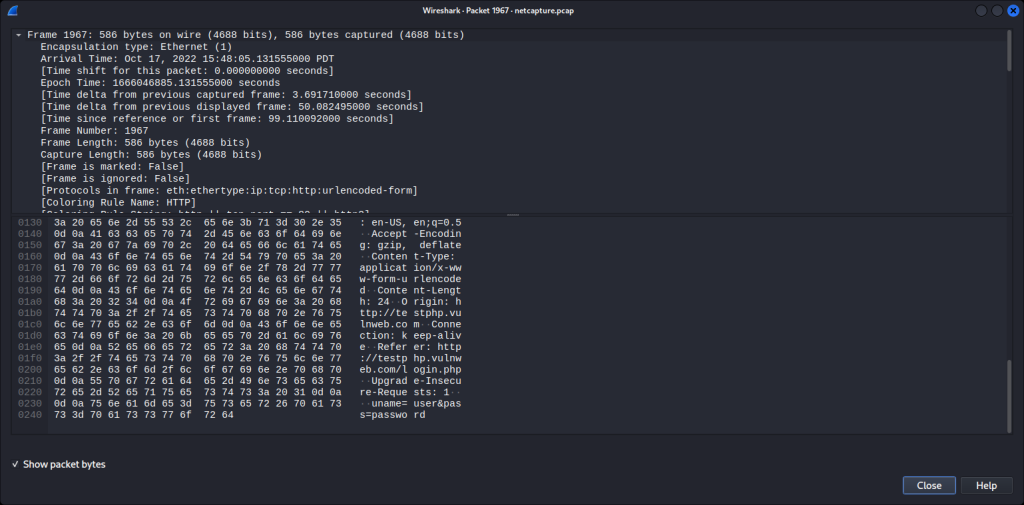
Scroll down to the bottom on the lower half of this screen with the hex data. Look in the bottom right corner of the text.

The credentials we entered are right there. Now, an even shorter way to get the credentials just to cement how easy it is to see credentials when they are sent in the clear.
Exit this screen. In the filter bar up top, enter tcp contains “password.”
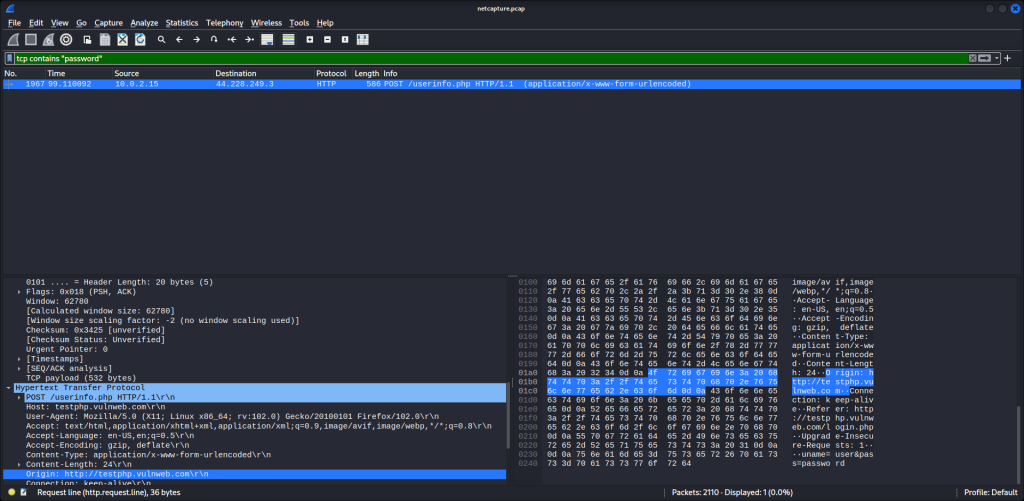
There’s the packet containing the password. Simple. If you’re going to use public Wi-Fi, consider using a VPN. If that’s not an option, don’t visit sites requiring personal identifiable information and make sure sites are using HTTPS. Browsers now have settings to make secure connections the default behavior. This is a great article showing how: https://www.eff.org/https-everywhere/set-https-default-your-browser
Thanks for reading.


